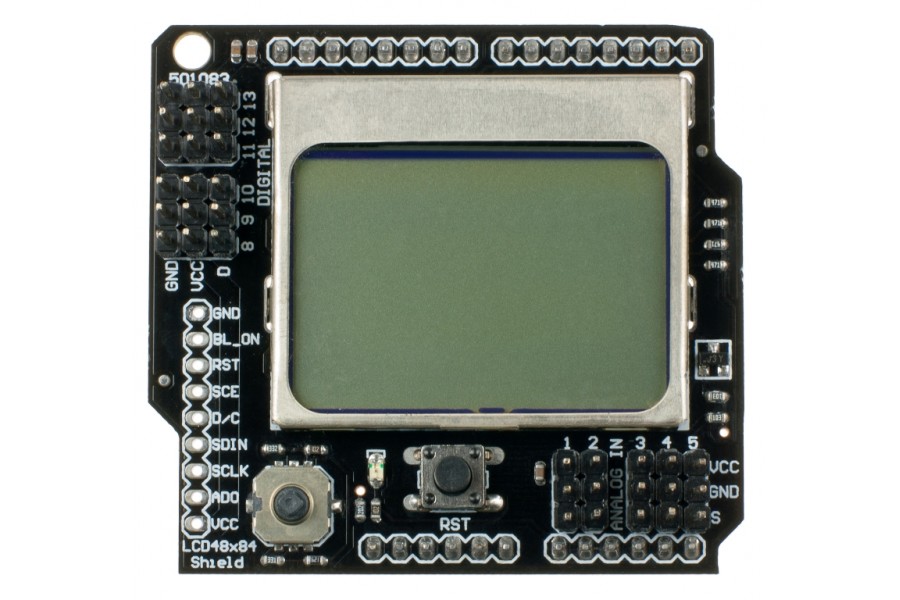
This was another shield that grabbed my attention, this LCD was used on some older nokia phones. You can find it on the internet at very reasonable rates , I have purchased this as a shield for an Arduino but you can also get a bare module and wire the display up to your Arduino
LCD Features
- SPI Interface (using Arduino Digital Pin 2,3,4,5,6)
- A Reset button
- A 5 degree joystick (using Arduino Analog Pin 0)
- Backlit control (Arduino DIO Pin 7)
Below the LCD is a four-way joystick with a built in button. This is connected to analog pin 0 via a resistor network. Here you can see a photograph of the shield and its running the example you will create later

lcd4884 shield
Reading the joystick position is accomplished via analogRead(0);. Setup some Serial debugging, open the Serial monitor and move the joystick around and take note of the values. In your sketch you can use an if conditional statement to perform an action based on the value returned
The shield requires an Arduino library which is in the link at the bottom of the page.
The example below initiliases the display, clears the screen and the displays some text. Method 1 uses constants for the x and y positions, method 2 hard codes these values. As you can see there is a function called lcd.LCD_write_string that displays text on the screen
OK, download the library from the link at the bottom, copy it into the Libraries folder and lets get started
Code
[codesyntax lang=”cpp”]
#include "LCD4884.h"

#define MENU_X 1
#define MENU_Y 1

void setup()
{
lcd.LCD_init();
lcd.LCD_clear();
lcd.LCD_write_string(MENU_X, MENU_Y, "test screen 1", MENU_HIGHLIGHT );
lcd.LCD_write_string(1, 3, "test screen 2", MENU_HIGHLIGHT );
}

void loop()
{
}
[/codesyntax]
Useful Links
LCD4484s library Download Link
Amazon US link – SainSmart Graphic LCD4884 Shield for Arduino
Amazon UK link – ATmega2560 + Graphic LCD4884 Shield for Arduino
